
Nov 25, 2020
.webp)
Creating a paid newsletter can be complicated. Here's the trick: You want to gate your content for paying members only, while keeping some marketing content public to acquire new subscribers. You also want to build a brand worth paying for.
In this guide, we'll walk through how to set up the back-end of a paid newsletter using a few software tools. We'll use Terry Godier’s paid newsletter, Conversion Gold, as an example.
1. The website
The first piece of tech (and marketing) that is a website. You need a landing page to direct potential subscribers to. You can use the pre-built landing pages from your newsletter platform, like most Substack users do, or create your own to control over the visual look and feel. Here's an example: Not Boring is hosted on Substack, but is promoted through an independent landing page.
Conversion Gold's landing page is built on WordPress. You’ll need a hosting company to bring it all online. DigitalOcean has a 1-click deployment for WordPress. It’s pretty darn simple, but we don’t recommend it for non-techie users. You are probably fine using a shared hosting plan, such as those offered by your domain registrar (Like GoDaddy) or just using the standard tools available within WordPress for domains and hosting.
For the design, Terry built his own theme from the boilerplate underscores theme. Don’t develop your own theme unless:
- You’re a developer.
- You really need something that off the shelf themes can’t provide.
- You have a lot of time on your hands.
For newsletters in particular, the landing page does not have to be fancy. An off the shelf design template should work just fine. Your landing page only needs to do two things:
- Get new subscribers.
- Allow subscribers to read archived issues of your newsletters.
2. Membership software
Next, you'll want to choose a piece of software that allows you to gate certain content on your website as "members only." Memberful is what Ben Thompson uses at Stratechery, and what Terry Godier uses at Conversion Gold, but there are several options.
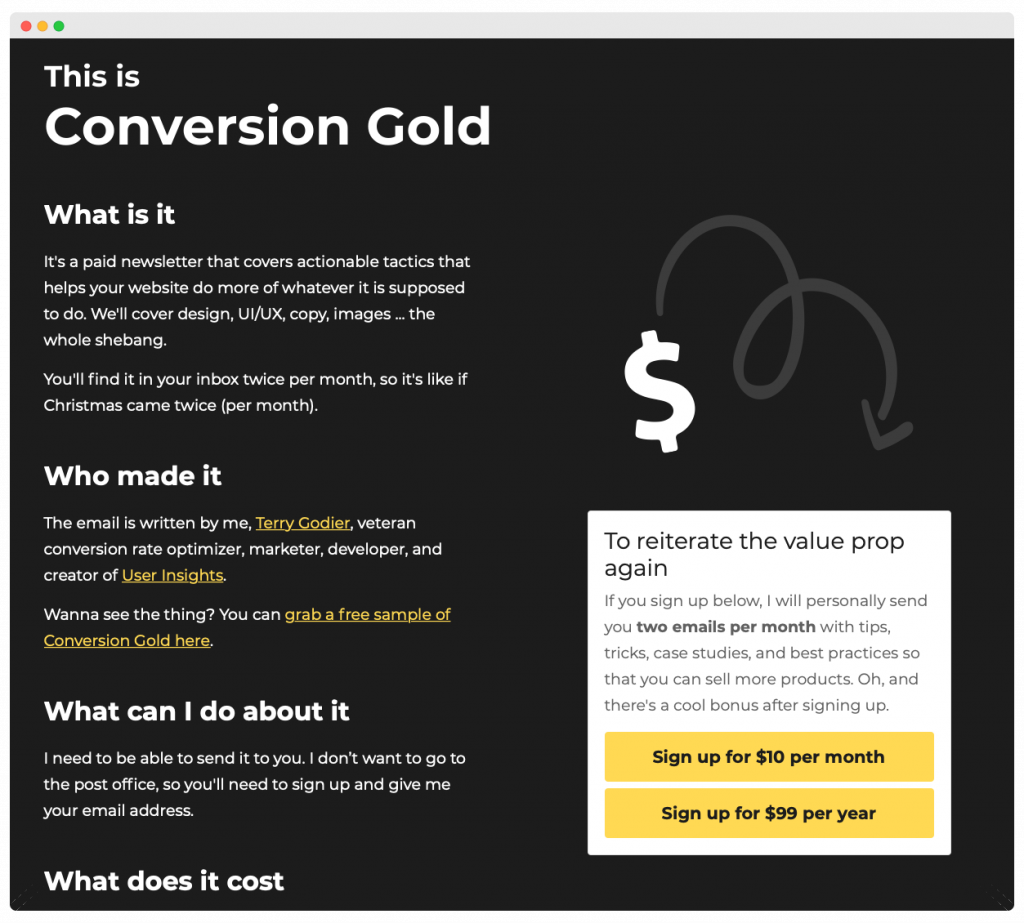
If you're using Memberful with Wordpress, you'll install a plugin and get a snippet of code that you can insert onto any link on your site. You can use these links to drive sign ups for your paid memberships. Here's what it looks like on Conversion Gold.
Here’s what it looks like when a user clicks on them (note that Apple Pay is showing on Macs).

The payments are handled through Stripe, so you’ll also need to have an account there if you want to mimic this flow. Memberful handles memberships, but Stripe handles credit cards and payments.
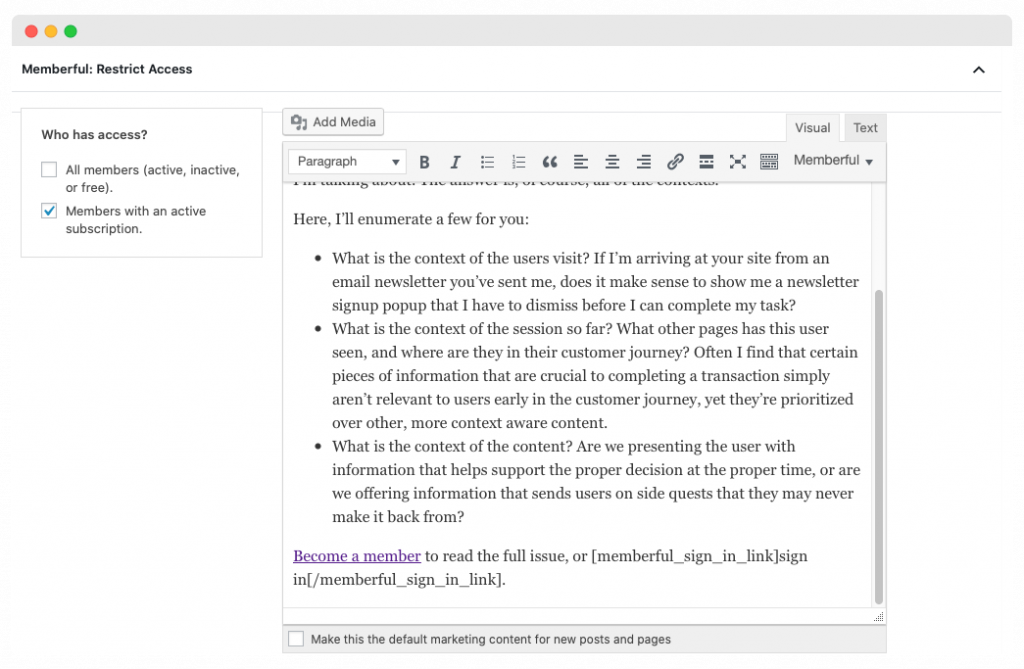
Next, in order to set up the members archives, use the Memberful plugin again to gate access to paying members. Here is what that looks like.
Here is what it looks like on the front end (what visitors see).
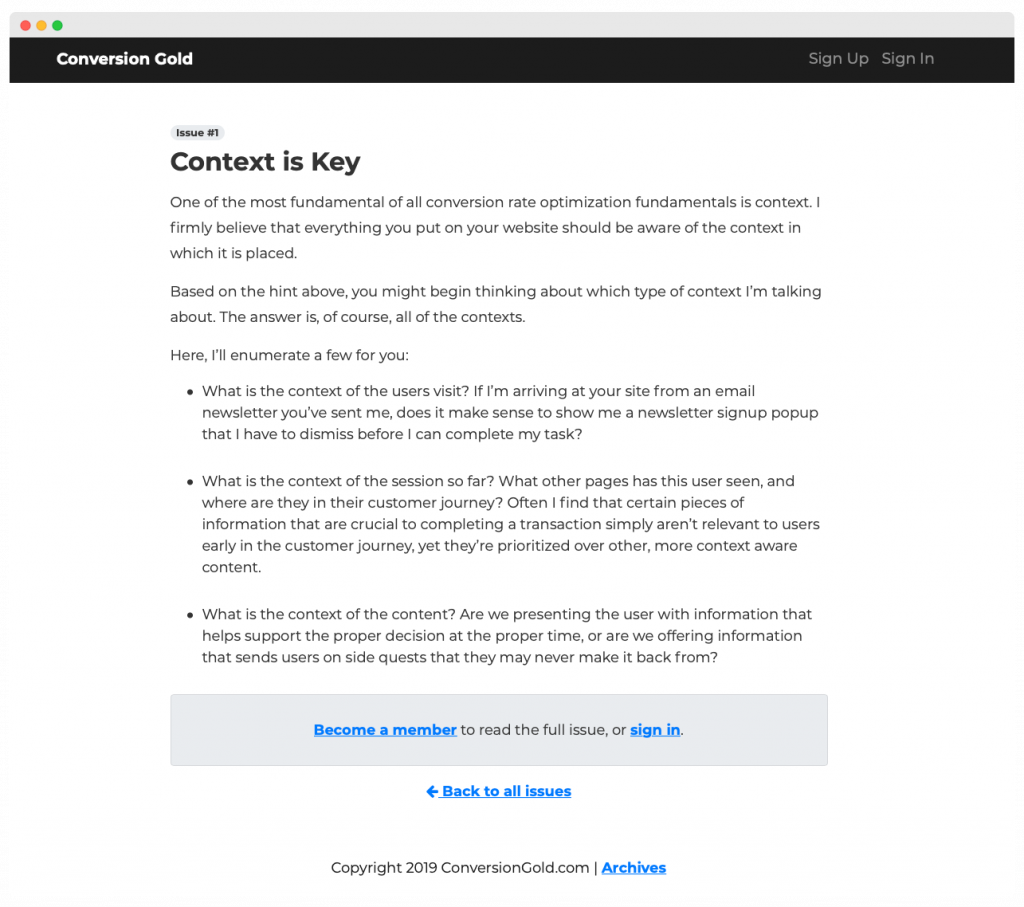
For Terry, showing a portion of the blog post above the paywall creates a funnel to attract new users, and encourage them to upgrade to a paid membership.
3. The email platform
Here's the most important choice for your email subscription business: The email service provider itself. Terry chose to use Mailchimp because it is free for the first 2,000 subscribers and integrates well with Memberful.
The email platform is in charge of a few distinct jobs:
- It needs to be the source of truth for all paying (and free) member email addresses.
- It needs to have an up-to-date status of the members paid subscription.
- It needs to be able to segment between paying members and free members so you can create specific content for both.
- It needs to hit the inbox when you send a newsletter.
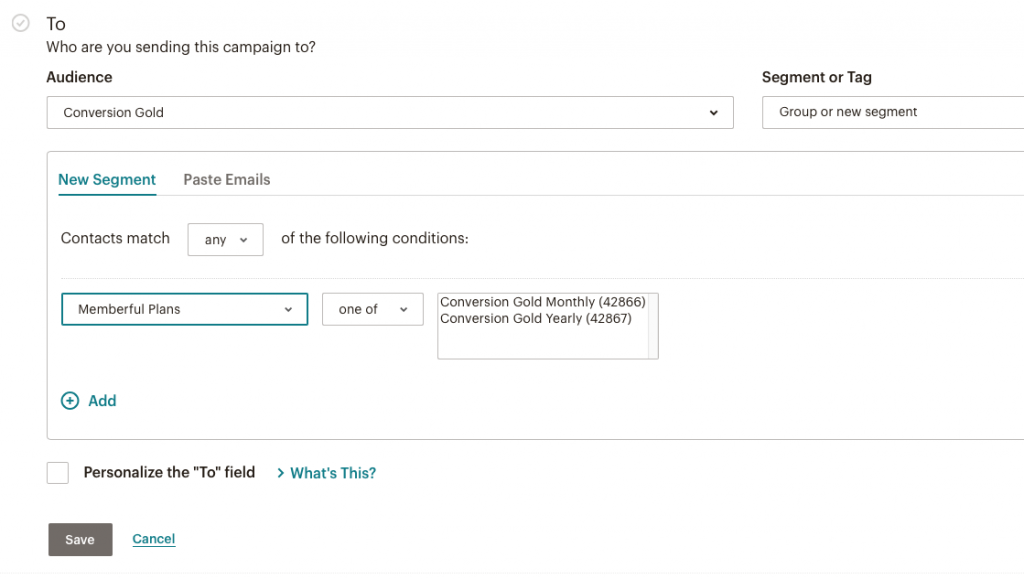
Memberful syncs directly with Mailchimp and maintains segments automatically. When creating a new campaign, you can segment by paying members or free members. Here's what it looks like.
Last, you want to think about deliverability. (Making sure your emails don't go to spam.) One major step that you can take though is authenticating your domain. That’s out of scope for this article, but Mailchimp has some support documentation on that here.
4. Publishing workflow
One of Substack’s key features is simultaneously publishing web and email versions of your newsletter. You can do the same using a WordPress plugin called Newsletter Glue. This plugin connects Mailchimp to WordPress and lets you build newsletters inside WordPress like a blog post.
By using this plugin, you achieve 4 things:
- Build and publish newsletters inside WordPress. Now that you’ve built your newsletter publishing stack on WordPress, why leave? With Newsletter Glue, you start each newsletter by creating a new blog post. Then you just write your newsletter directly in the post editor, and publish to send. Much better than writing it in Mailchimp, then copying and pasting into WordPress to restrict the content later.
- Automatically create a newsletter archive. When you write directly in WordPress, every newsletter is a new post. So you naturally have a web version for your newsletter archive, which you can restrict using the Memberful plugin as mentioned above.
- Easily send to paid member segment. Newsletter Glue lets you choose the correct segment to send each newsletter to without leaving WordPress.
- Use special newsletter blocks to help your newsletter stand out. Like author bylines, reading times and callout cards. You can even embed Tweets simply by pasting the link.
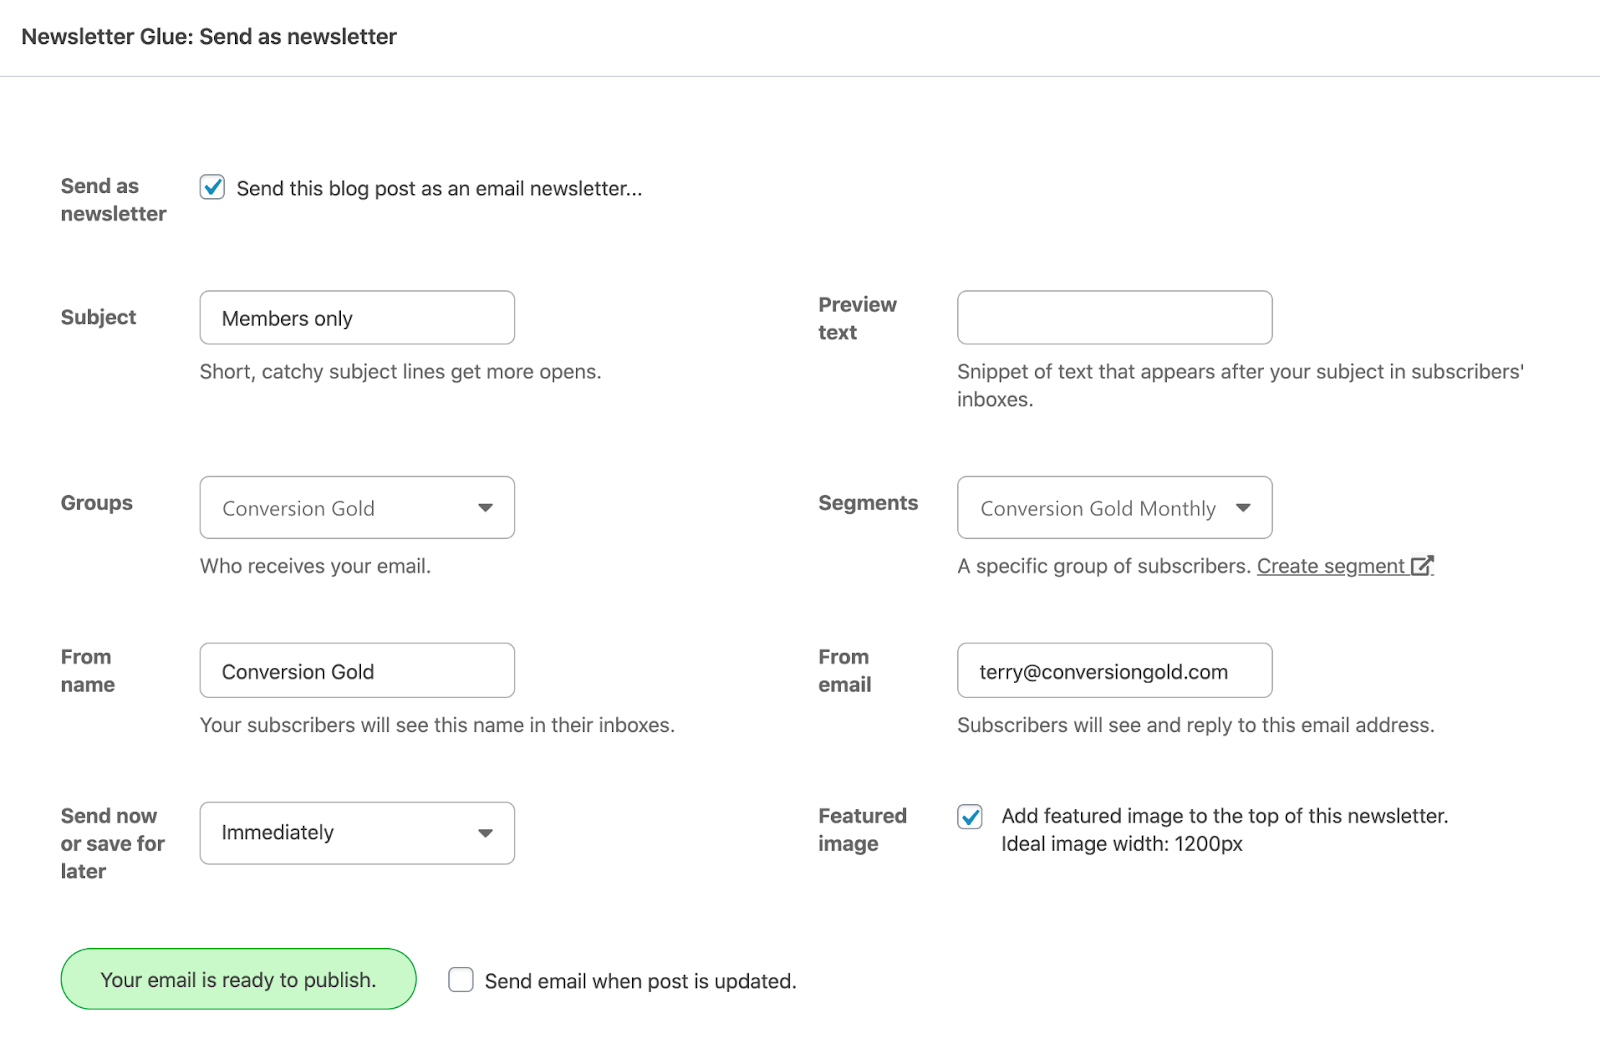
Here are Newsletter Glue’s Send as newsletter settings. Once you’ve written your members-only newsletter, you can select the correct segment, and send your newsletter without ever leaving WordPress. Newsletter Glue turns your WordPress post editor into a complete newsletter builder. It also glues Memberful, Mailchimp and WordPress together so that your WordPress site becomes a one-stop publishing hub.
5. The analytics
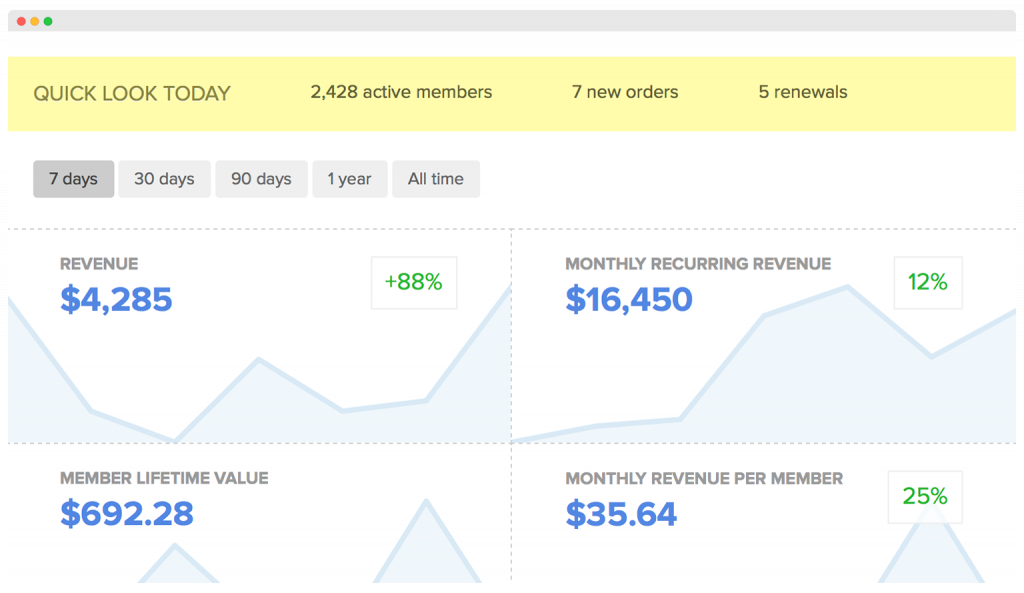
Memberful provides a nice dashboard showing revenue, subscriber count (per plan), and churn. Churn is when members kill their subscription. It’ll happen pretty much every time you send an email, so just expect it. It’s not that people hate the email that you’ve just sent, it’s just that getting the email might serve as a reminder that they wanted to cancel anyway.
Here is an example dashboard from Memberful
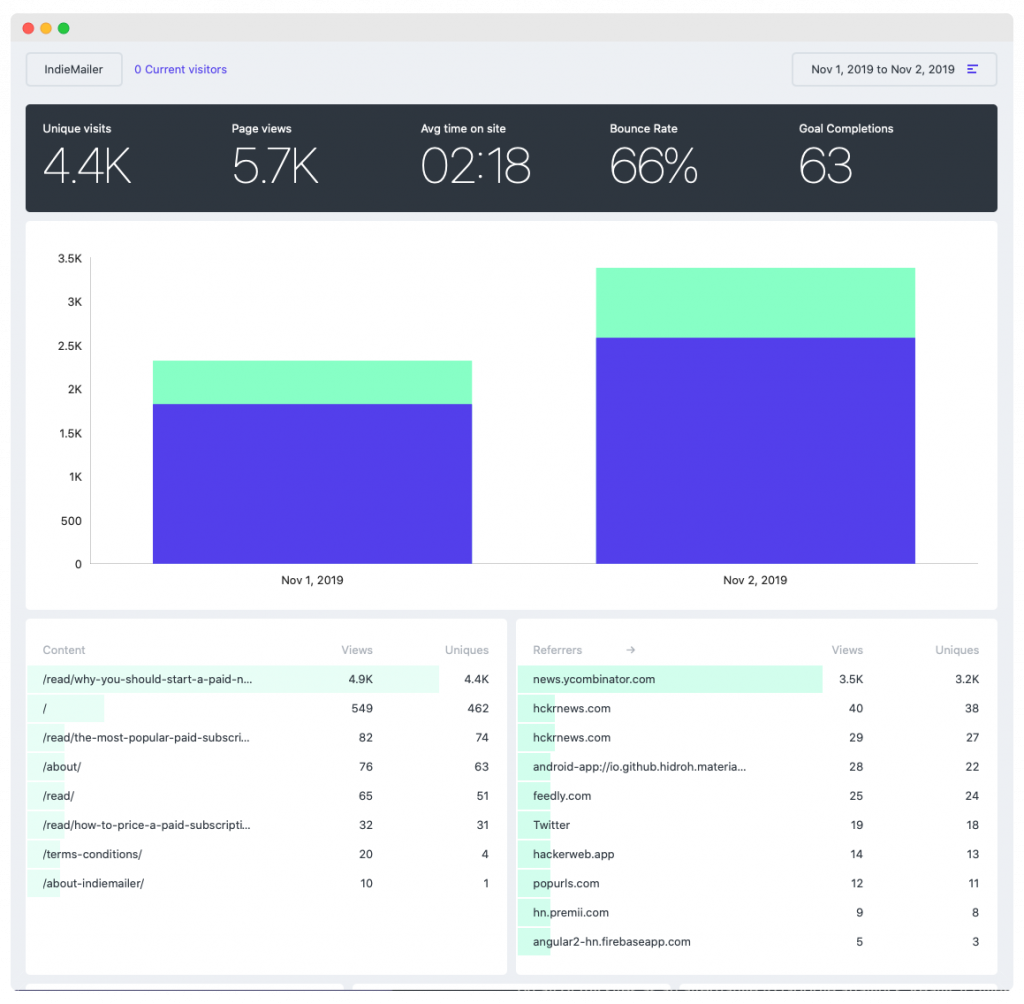
For the website itself, one great privacy focused example is Fathom analytics. Many newsletters use this as an alternative to Google analytics. It provides everything you’d need and respects your visitors' privacy. Here are some stats for IndieMailer so you can see what it looks like.
Mailchimp offers stats on the email side. They give you:
- How many emails you’ve sent.
- How many members you have (by segment, or account level).
- How many people opened the emails.
- How many clicks on each of the links in the email.
And a few more things, but those are the ones that are most useful.
And that’s it — that’s the entire tech stack for Terry Godier's paid subscription newsletter. There are dozens of ways to set this up, but this is the one that was chosen for this example, given the constraints, requirements, and skillset. We plan to go into more detail on other platforms and setups in the future.
